Assign Role-Based Permissions
A guide to creating Role-Based Permissions settings and assigning them to your users.
Role-Based Permissions help you limit which users have access to specific features in Breadcrumb by assigning them standardised permissions called Roles. This guide will show you how to create roles and assign them to users.
Table of Contents
Requirements
Permissions: Company Host Permissions are required to access the Company Settings. If you do not have access, please contact your Breadcrumb administrator.
Web Portal Instructions
Step 1: Navigate to the Permissions Settings
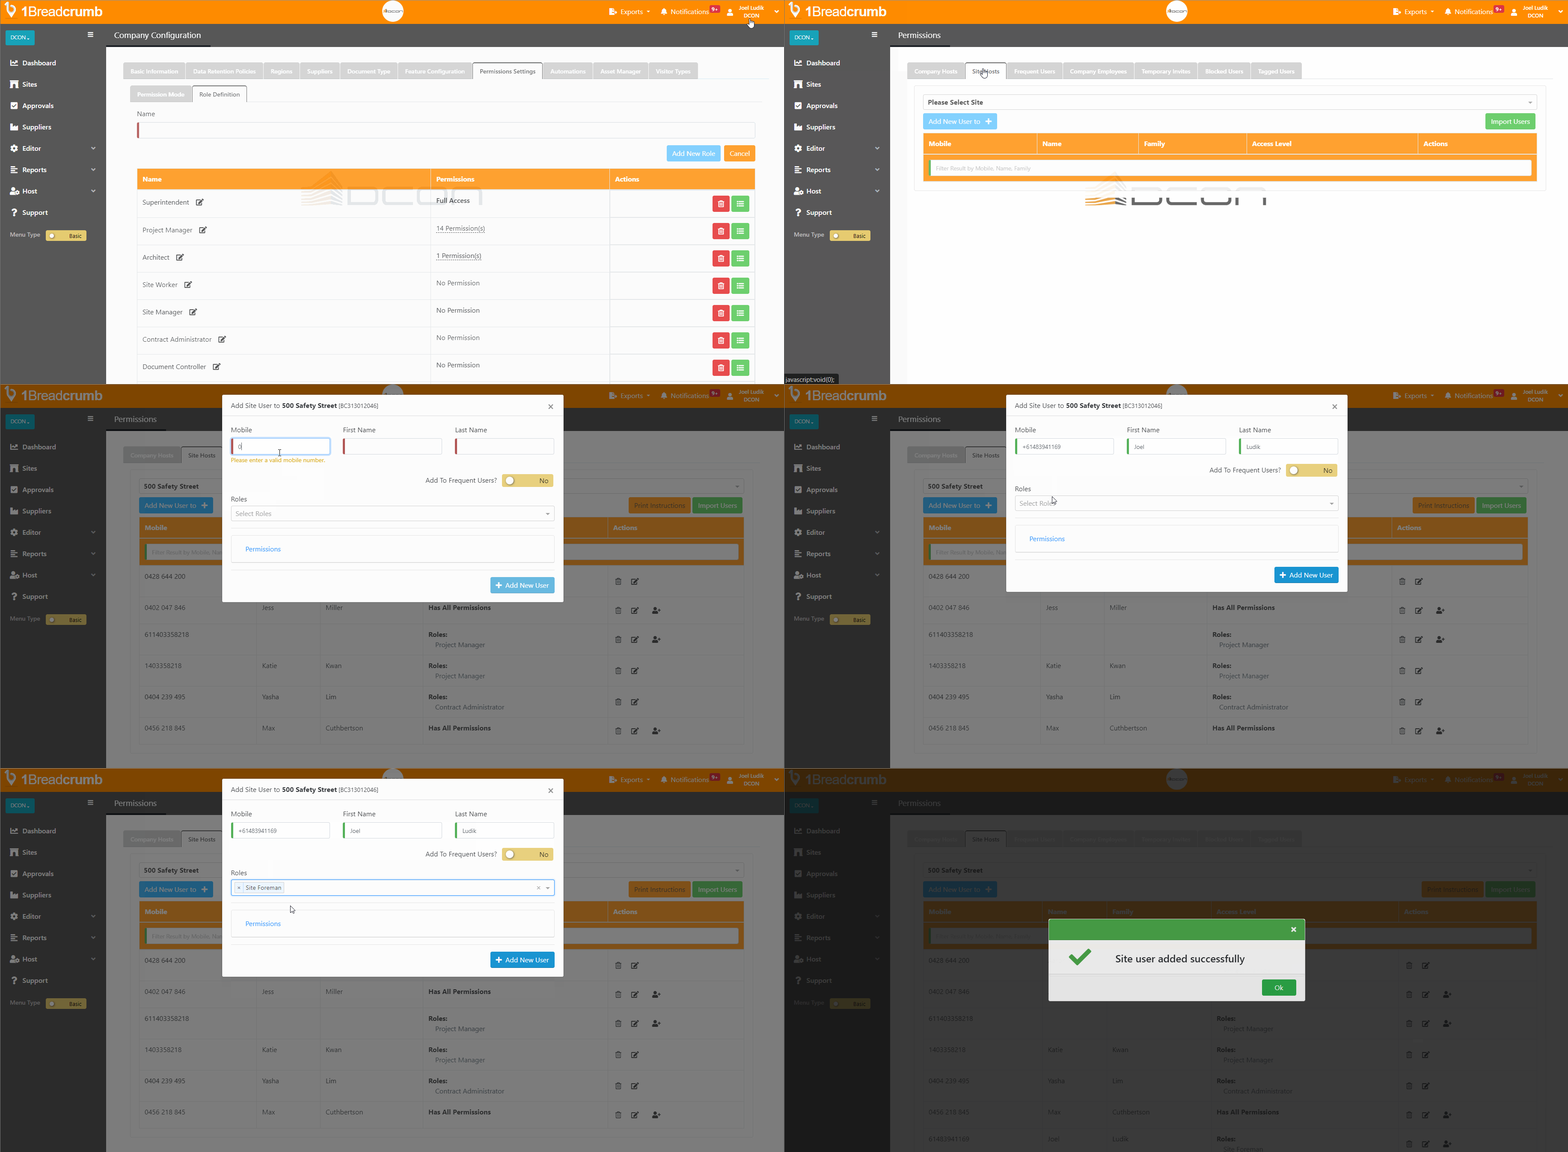
- Click on your name on the top right of the screen
- From the dropdown, select Company Settings
- Navigate over to the Permissions Settings tab
- Select the Role Definition sub-tab

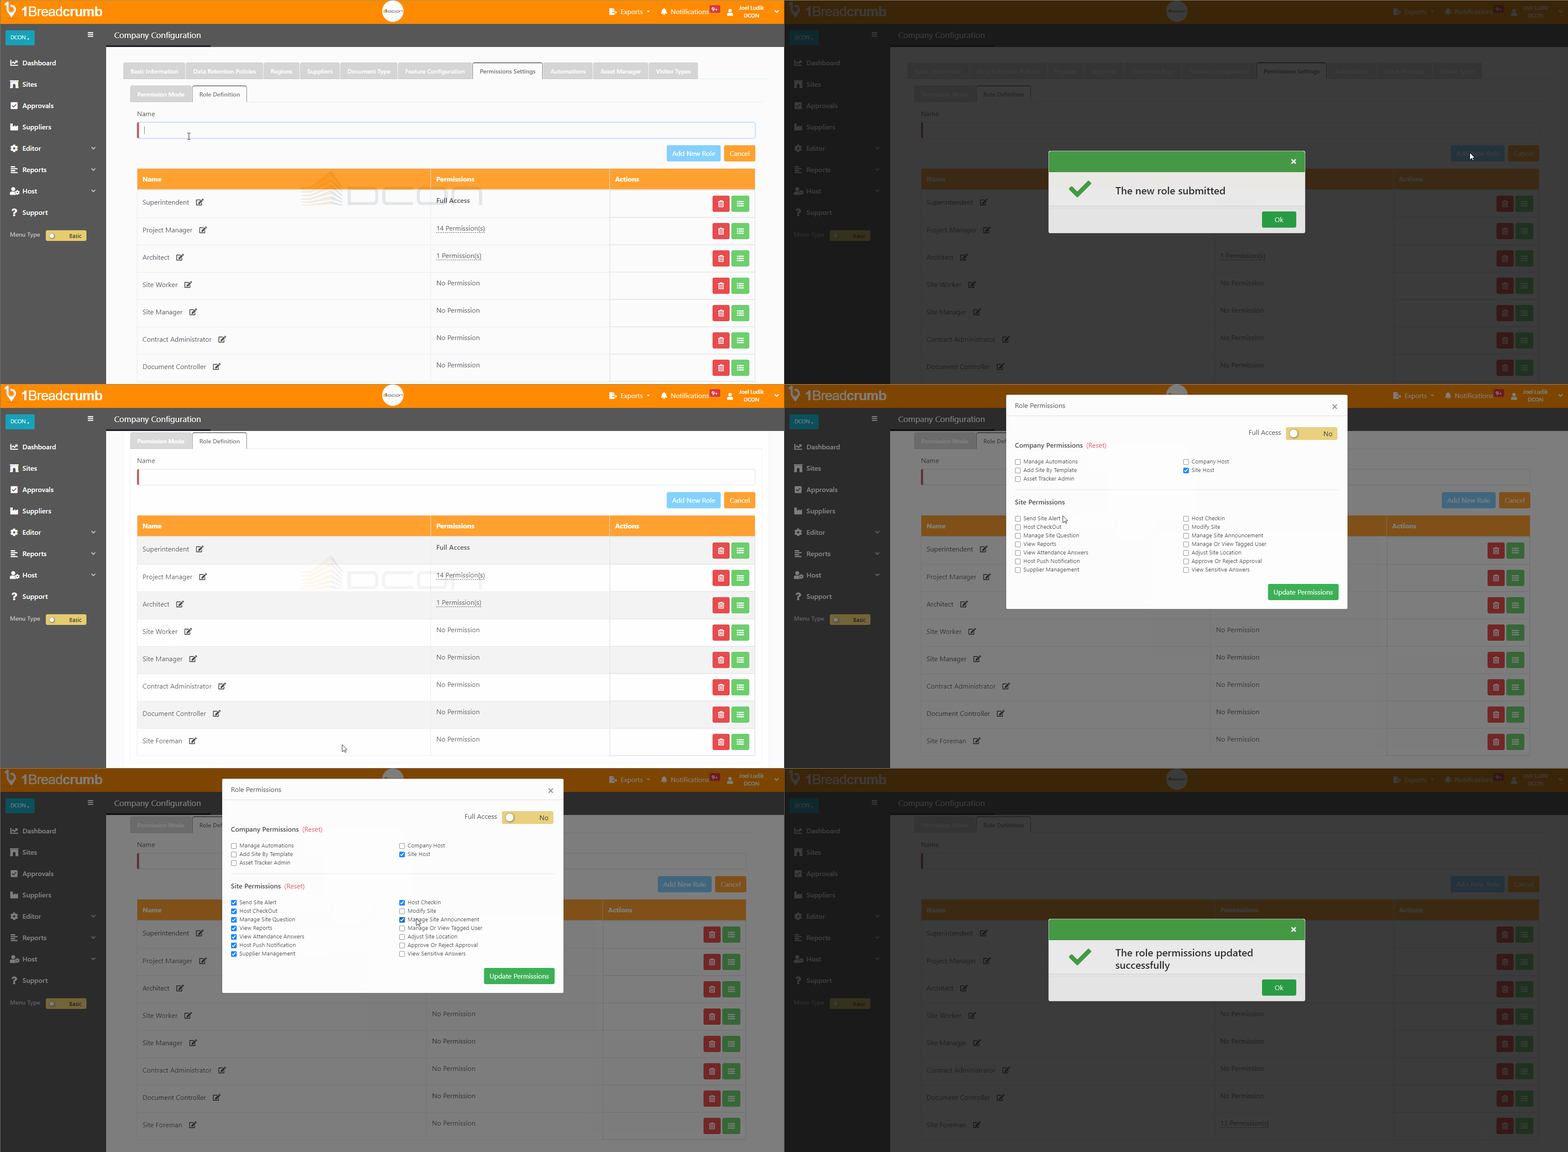
Step 2: Add a New Role and Define the Role's Permissions
- Under Name, give your Role a name and select Add New Role
- Note: If you use Procore, these roles will automatically pull from Procore. Here is a guide on how to set that up: Click Here
- Once added, find your Role from the list below
- Select the green Permissions button on the right of your new Role
- Assign the specific Permissions you want for that Role
- Click on Update Permissions to save your changes

Step 3: Navigate to the User Permissions Menu
- Click on your name on the top right of the screen
- From the dropdown, select Permissions
- On the permissions page, you can add roles to an existing user or create a new user and assign them a role
Step 4:
💡Users will either exist in Company Hosts or Site Hosts, view this article to understand the difference: Explained: Company Hosts v Site Hosts
Adding a New User and Assigning a Role
- Select Add New User + and enter their Mobile Number
- Under Roles, select your new role from the dropdown
- Select + Add New User to finalise the changes

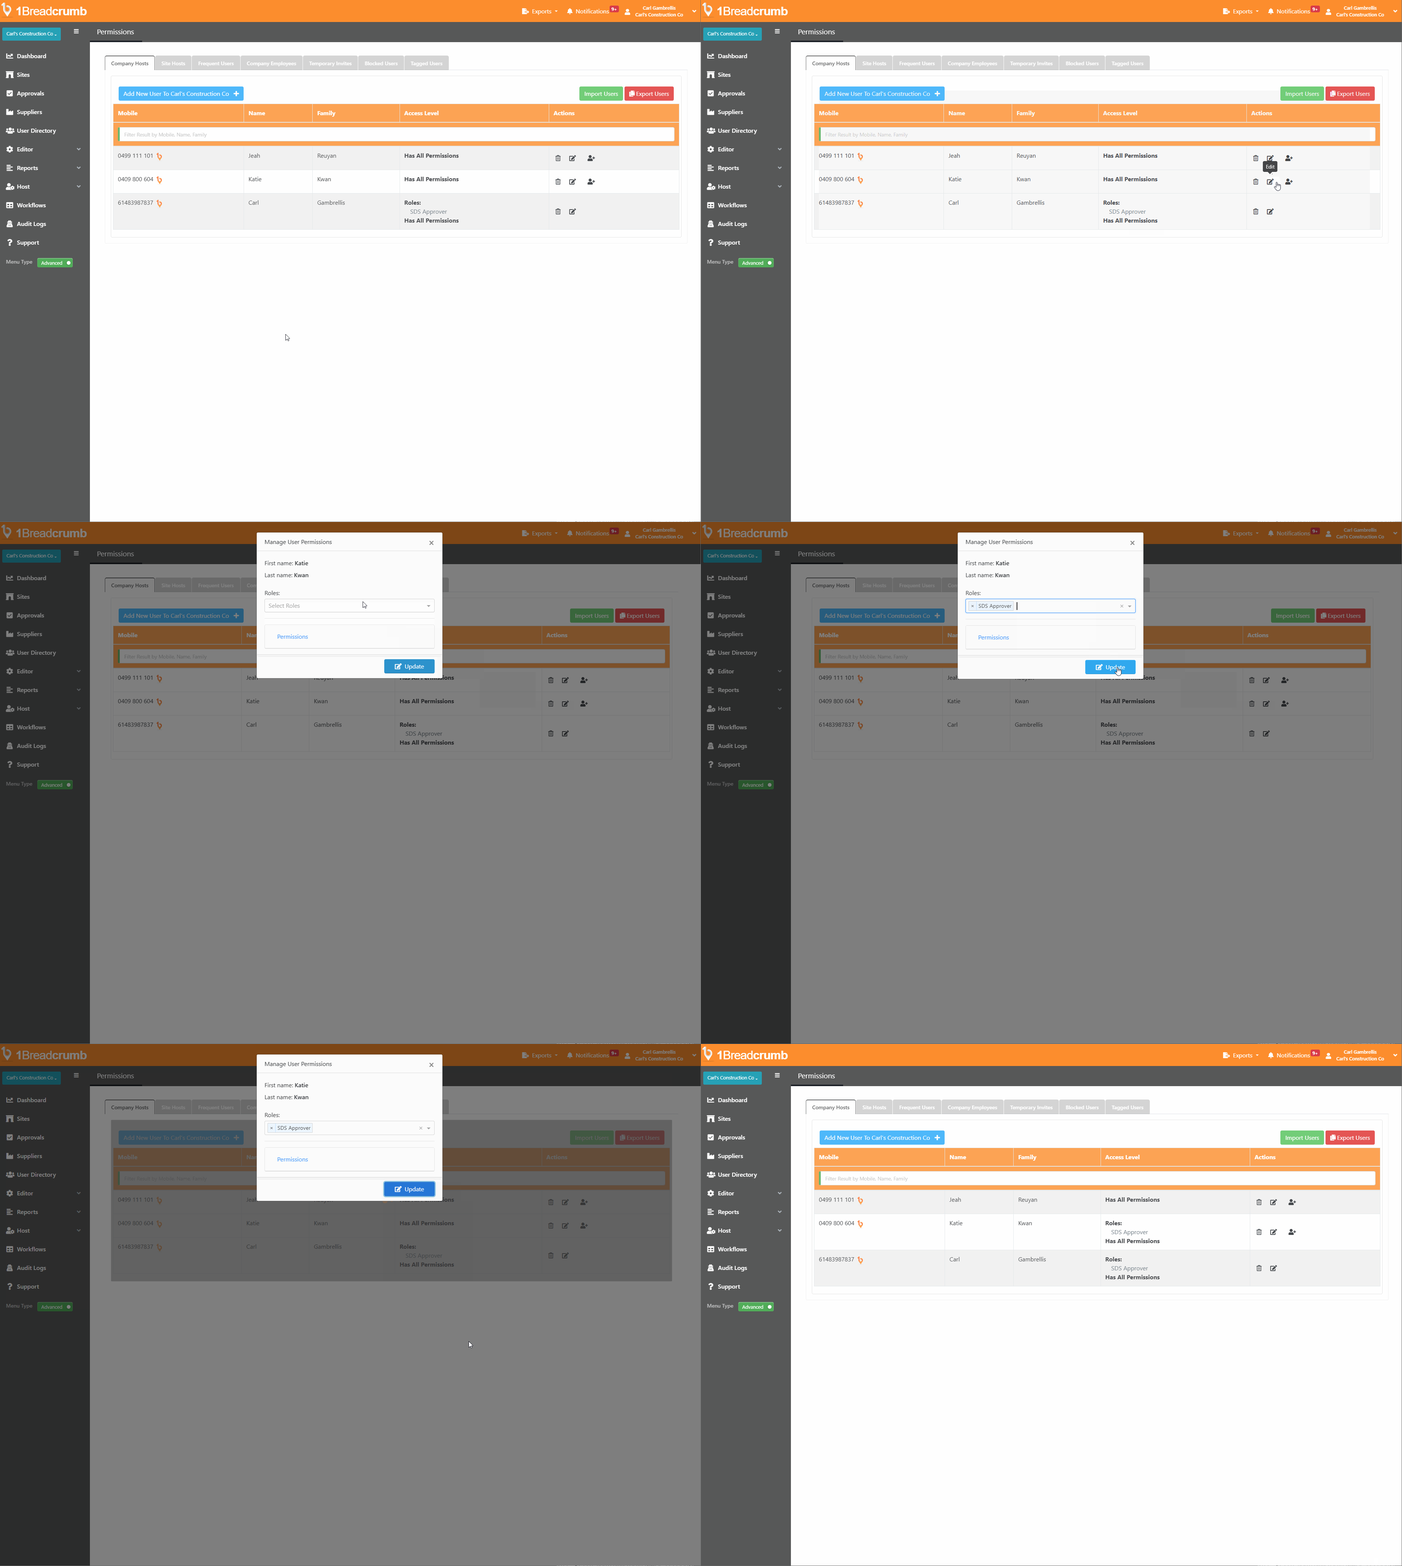
Assigning a Role to an Existing User
- Navigate to the Company Host or Site Host tab and find the desired user
- Select the Edit button for the desired user
- Open the Roles drop down menu and select the desired role
- Select the Update button once satisfied

Mobile App Instructions
This feature is not available on the Mobile App.