Once a Permit has been applied for by the Subcontractor/Worker and approved by the Site Manager, there are a number of Permit Lifecycle Stages the Permit can progress through before eventually being closed out and deactivated. This guide will teach you what those stages mean, and how to manage a Permit through them.
Permit Lifecycle Stages:
- Open: The Permit is Active, and works are currently underway.
- On-Hold: The Permit is Active, but works are not currently underway.
- Closed: The Permit is No Longer Active, works are complete.
Table of Contents
Requirements 🔑
Permissions: Company or Site Host Permissions required. If you do not have access, please contact your Breadcrumb administrator.
Web Portal Instructions 💻
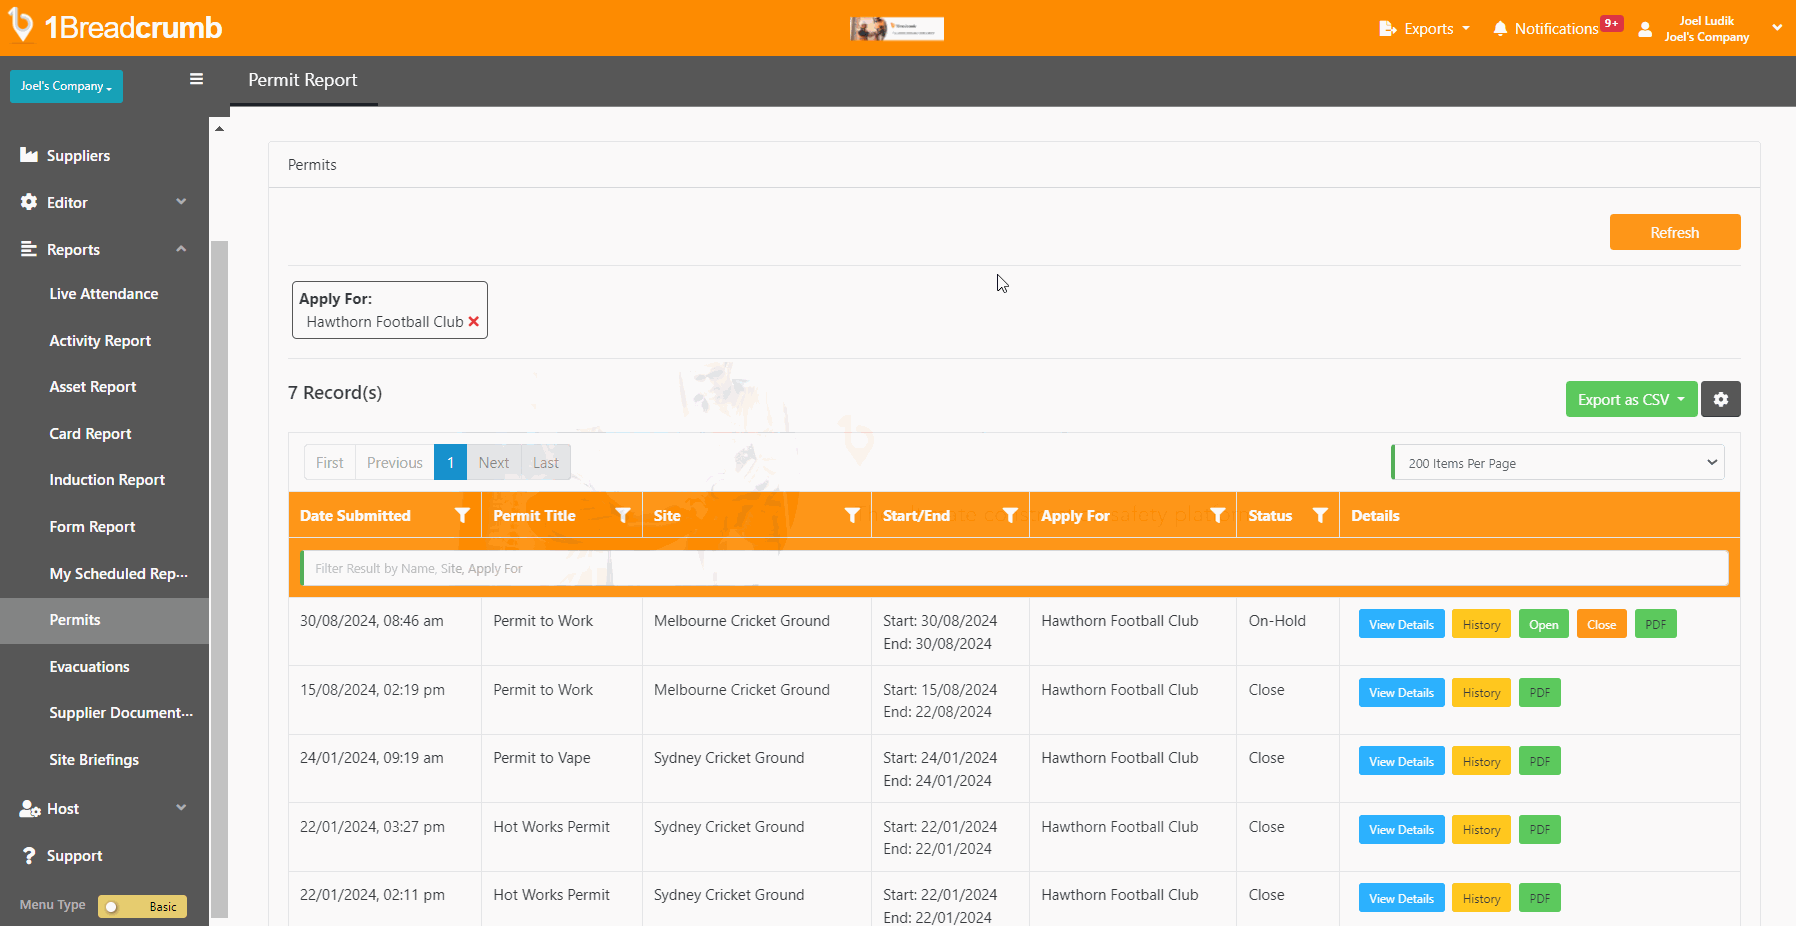
Step 1: Navigate to the Permit Report and Find the Permit
- Click on the Reports menu on the left-hand toolbar, then select Permits
- In the Permit Report, use the search bar or filters to find the Permit
Step 2: Open the Permit
- Once you have found the Permit, click the green Open button
- If set up, you may be required to complete an Open Form
- Complete the form and click Submit to Open the Permit
- Note: This means you are now actively commencing the works listed in the Permit
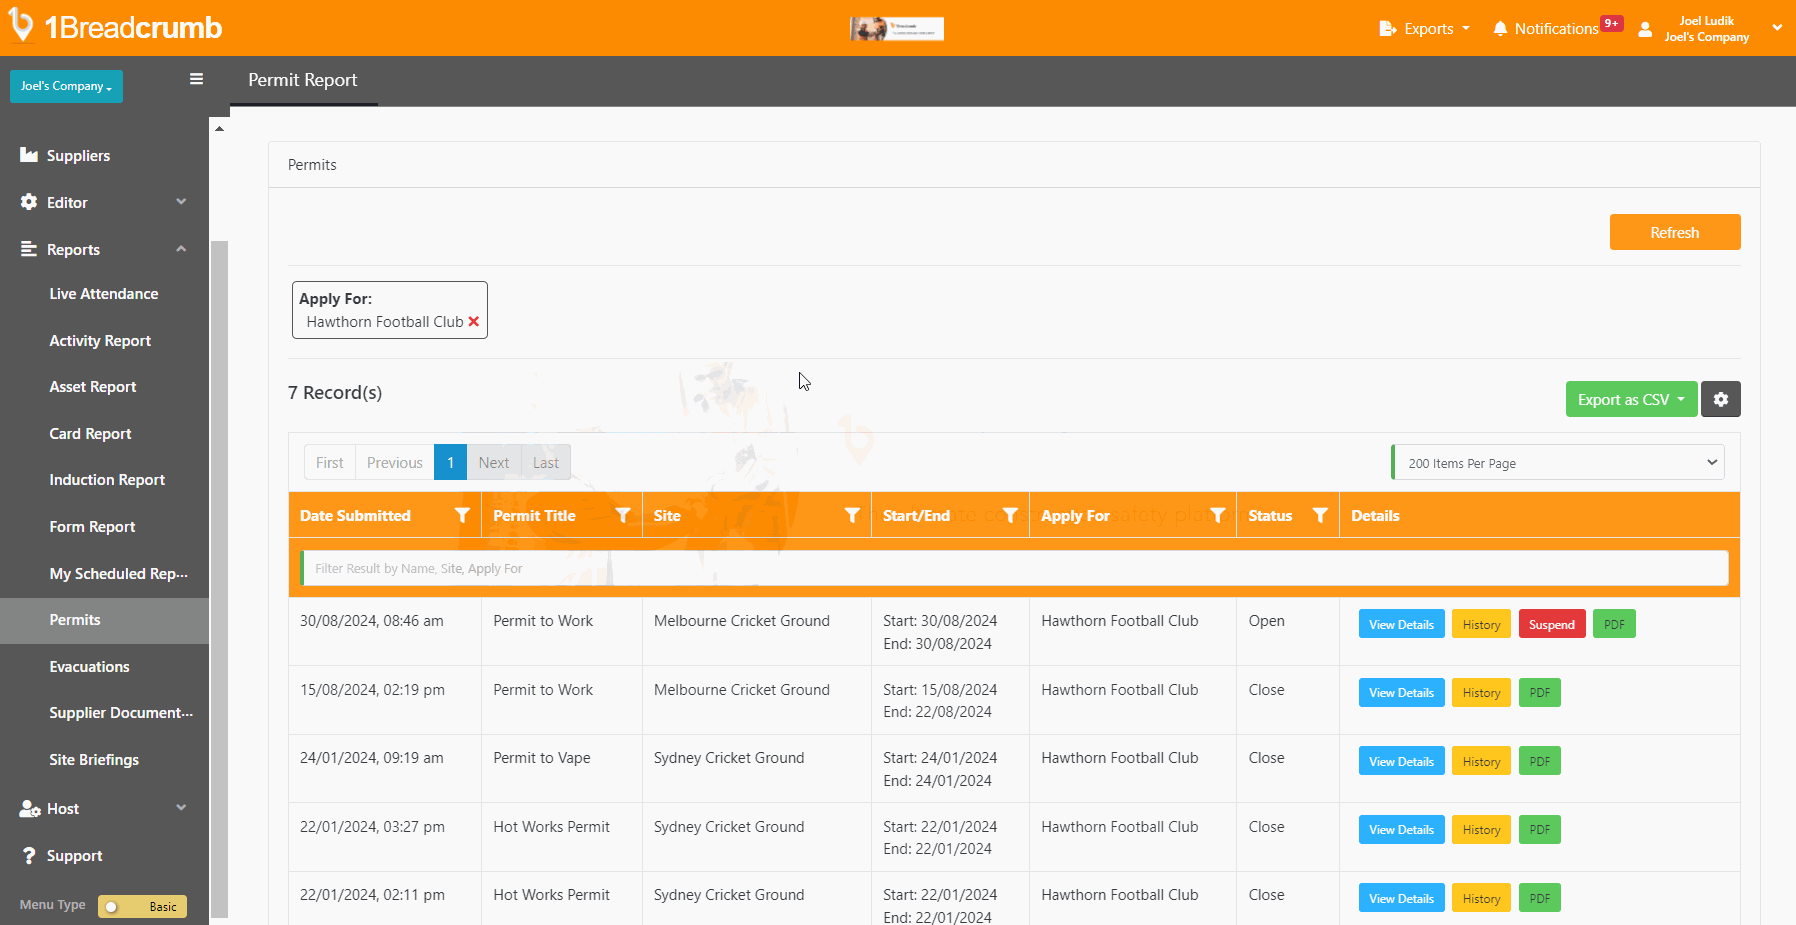
Step 3: Suspend the Permit
- Find the Open Permit that you want to suspend and click the red Suspend button
- If set up, you may be required to complete an On-Hold Form
- Complete the form and click Submit to Suspend the Permit
- Note: This means you have finished the works listed in the Permit for today - it can be opened once works commence again.
Step 4: Close the Permit
- Find the Permit that you want to Close and click the orange Close button
- If set up, you may be required to complete a Close Form
- Complete the form and click Submit to Close the Permit
- Note: This means you have finished the works listed in the Permit and it can no longer be opened - you will need to apply for a new permit to commence works.

Mobile App Instructions 📱
Step 1: Navigate to Permits in the Host Panel
- Start by clicking on the Host panel on the bottom right of the screen
- Click Change Site if required to select the Site you are currently on
- Select the Permits tile to view all Permits that have been previously Approved
- Find the Approved Permit you wish to manage and click on the dropdown arrow

Step 2: Open the Permit
- From the dropdown, click the orange Open button
- If set up, you may be required to complete an Open Form
- Complete the form and click Submit to Open the Permit
- Once Open, the Permit will have a Green Tick next to it
- Note: This means you are now actively commencing the works listed in the Permit

Step 3: Put the Permit On-Hold
- From the dropdown, click the red Place On Hold button
- If set up, you may be required to complete an On-Hold Form
- Complete the form and click Submit to Open the Permit
- Once On-Hold, the Permit will have a Yellow Tick next to it
- Note: This means you have finished the works listed in the Permit for today - it can be opened once works commence again.

Step 4: Close the Permit
- From the dropdown, click the white Close button
- If set up, you may be required to complete a Close Form
- Complete the form and click Submit to Open the Permit
- Once Closed, the Permit will no longer show in the Approved Permits screen
- Note: This means you have finished the works listed in the Permit and it can no longer be opened - you will need to apply for a new permit to commence works.

You now know how to manage an Approved Permit. You can report on these Permits via the Permit Report, or under the Project Documents Folder if you are a Procore user.