Set Up an Asset Report Form
A guide for setting up the Form used to Register New Assets in the Asset Report/Asset Tracker
The Asset Report helps you keep a register of all Plant and Equipment owned by your Company, see where it is located, and who has borrowed it in the past. This report works in conjunction with the Asset Tracker tool on the Mobile App to allow users listed as Company Employees to borrow/return Plant and Equipment. This guide will show you how to set up the form used to register a new asset to the Asset Report.
Table of Contents
Requirements
Permissions: Company Host Permissions required. If you do not have access, please contact your Breadcrumb administrator.
Web Portal Instructions
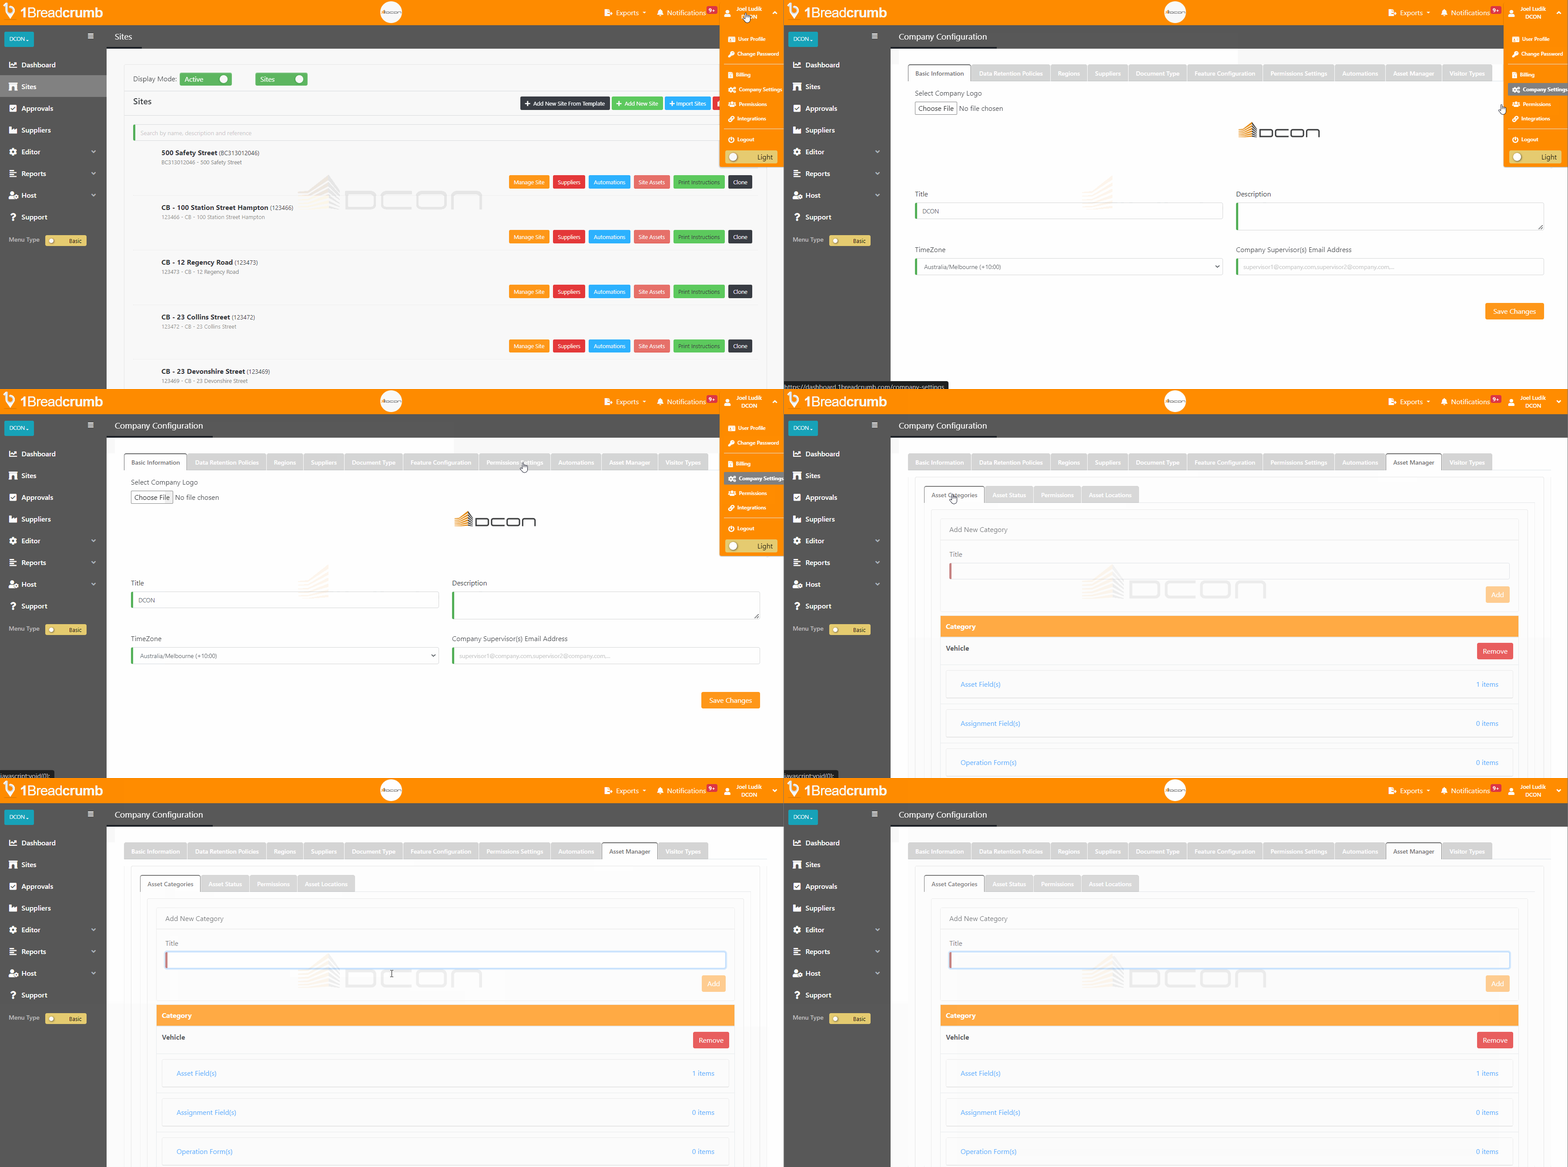
Step 1: Navigate to the Asset Report Settings
- Click on your Name in the top right corner of the web portal
- From the dropdown, select Company Settings
- Click over to the Asset Manager tab
- You should now be in the Asset Categories sub-category

- Under Add New Category, give your category a Title (EG: Vehicle) and select Add if you do not have any Asset Categories already created
Step 2: Add Asset Fields
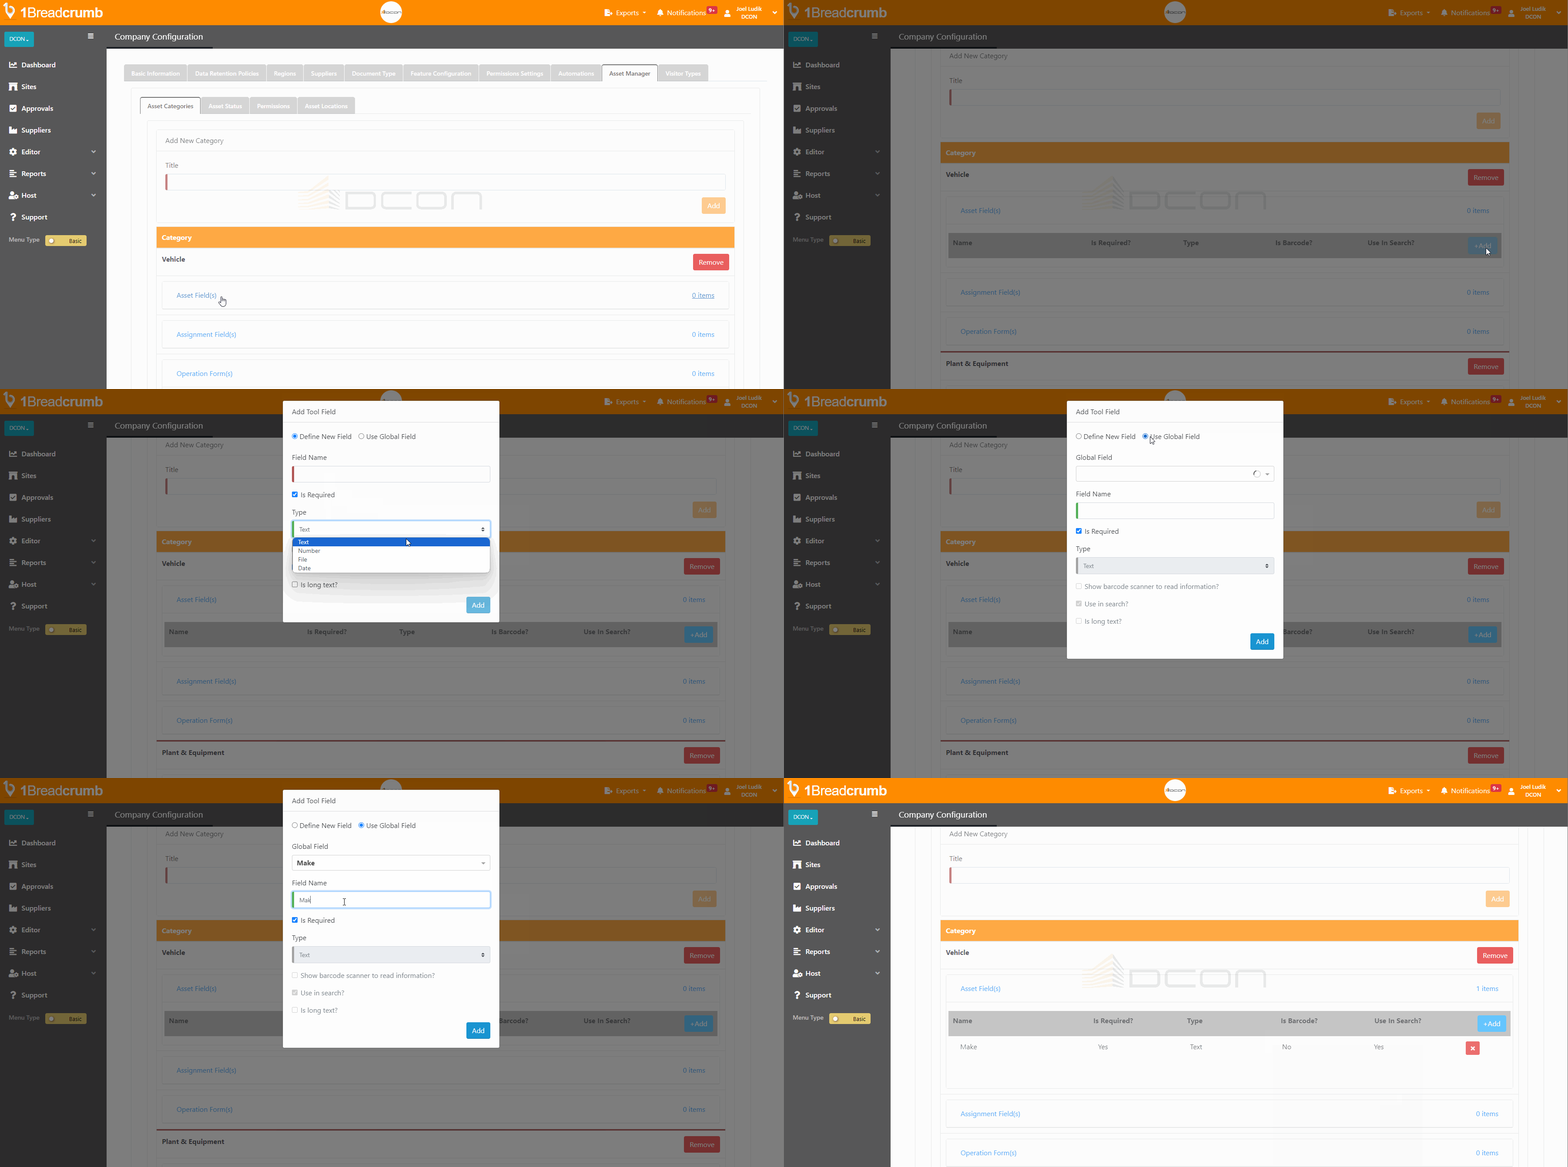
- Scroll down to the Asset Category you wish to edit and select Asset Field(s)
- Select +Add to begin adding Fields to the Asset Report Form
- Asset Fields determine what information you want to collect when someone registers a new Asset to the Asset Report
- Choose between Define New Field or Use Global Field (recommended)
- Define New Field: Create a custom field to add to your form
- Next, add the following fields:
- Field Name: The name that will display for this field in the form
-
Is Required: Is the field mandatory or not
-
Type: The type of data being collected in the field
-
Show barcode scanner to read information: Allow users to scan a QR/Barcode to automatically fill this field if registering an Asset on the App using the phone camera. This requires you to manually create your own QR/Barcode and assign information to it that can be scanned
-
Use in Search: Allows you to search for this field in your Asset report
-
Is Long Text: Uses a long text field rather than a short text field
- Select Add to save changes
- Next, add the following fields:
- Define New Field: Create a custom field to add to your form
-
- Use Global Field: Select from a pre-defined range of fields (recommended)
Global Fields can automatically populate plant induction forms that ask for the same information in the future, saving you time.
-
- Search and select the Global Field you want to use
- Next, add the following fields:
- Field Name: The name that will display for this field in the form
- Is Required: Is the field mandatory or not
-
- Use Global Field: Select from a pre-defined range of fields (recommended)

Step 3: Add Assignment Fields
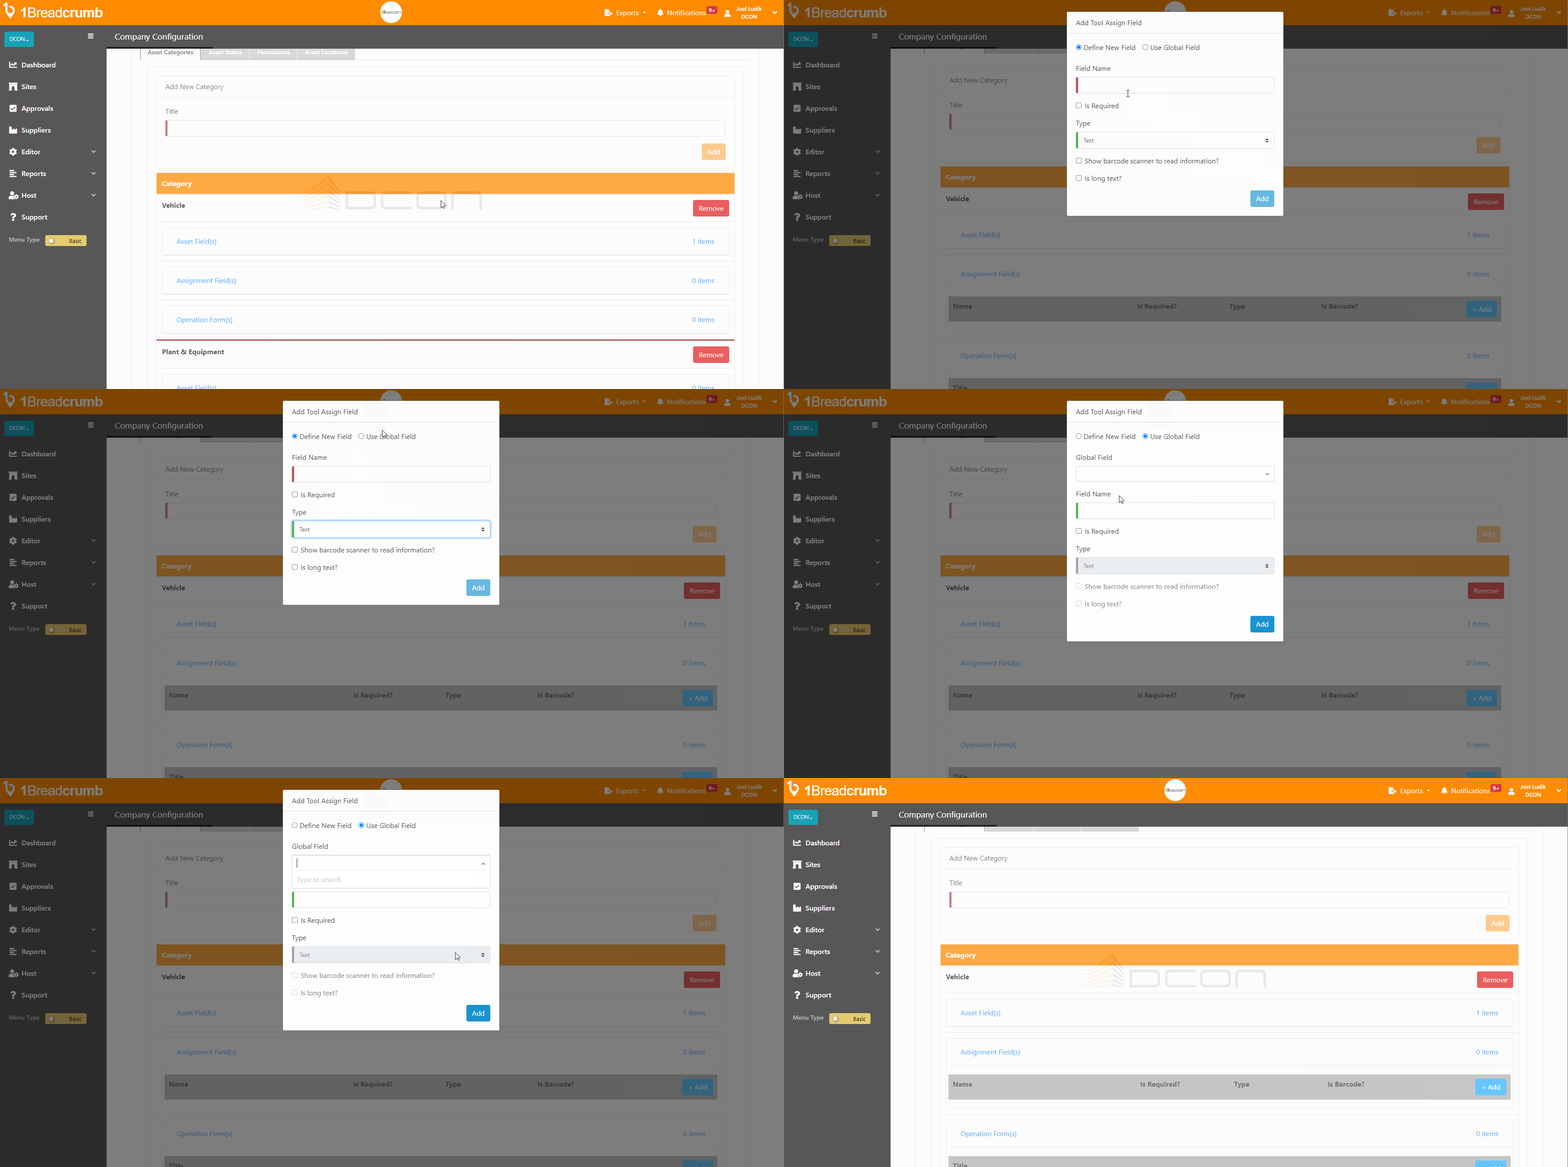
- Scroll down to the Asset Category you wish to edit and select Assignment Field(s)
- Select +Add to begin adding Assignment Fields to the Asset Report Form
- Assignment Fields are an optional field that users can populate once they return the Asset they have borrowed (EG: odometer, petrol, etc.)
- Define New Field: Create a custom field to add to your form
- Next, add the following fields:
- Field Name: The name that will display for this field in the form
-
Is Required: Is the field mandatory or not
-
Type: The type of data being collected in the field
-
Show barcode scanner to read information: Allow users to scan a QR/Barcode to automatically fill this field if registering an Asset on the App using the phone camera. This requires you to manually create your QR/Barcode and assign information to it that can be scanned
-
Use in Search: Allows you to search for this field in your Asset report
-
Is Long Text: Uses a long text field rather than a short text field
- Select Add to save changes
- Next, add the following fields:

Step 4: Add Operation Forms
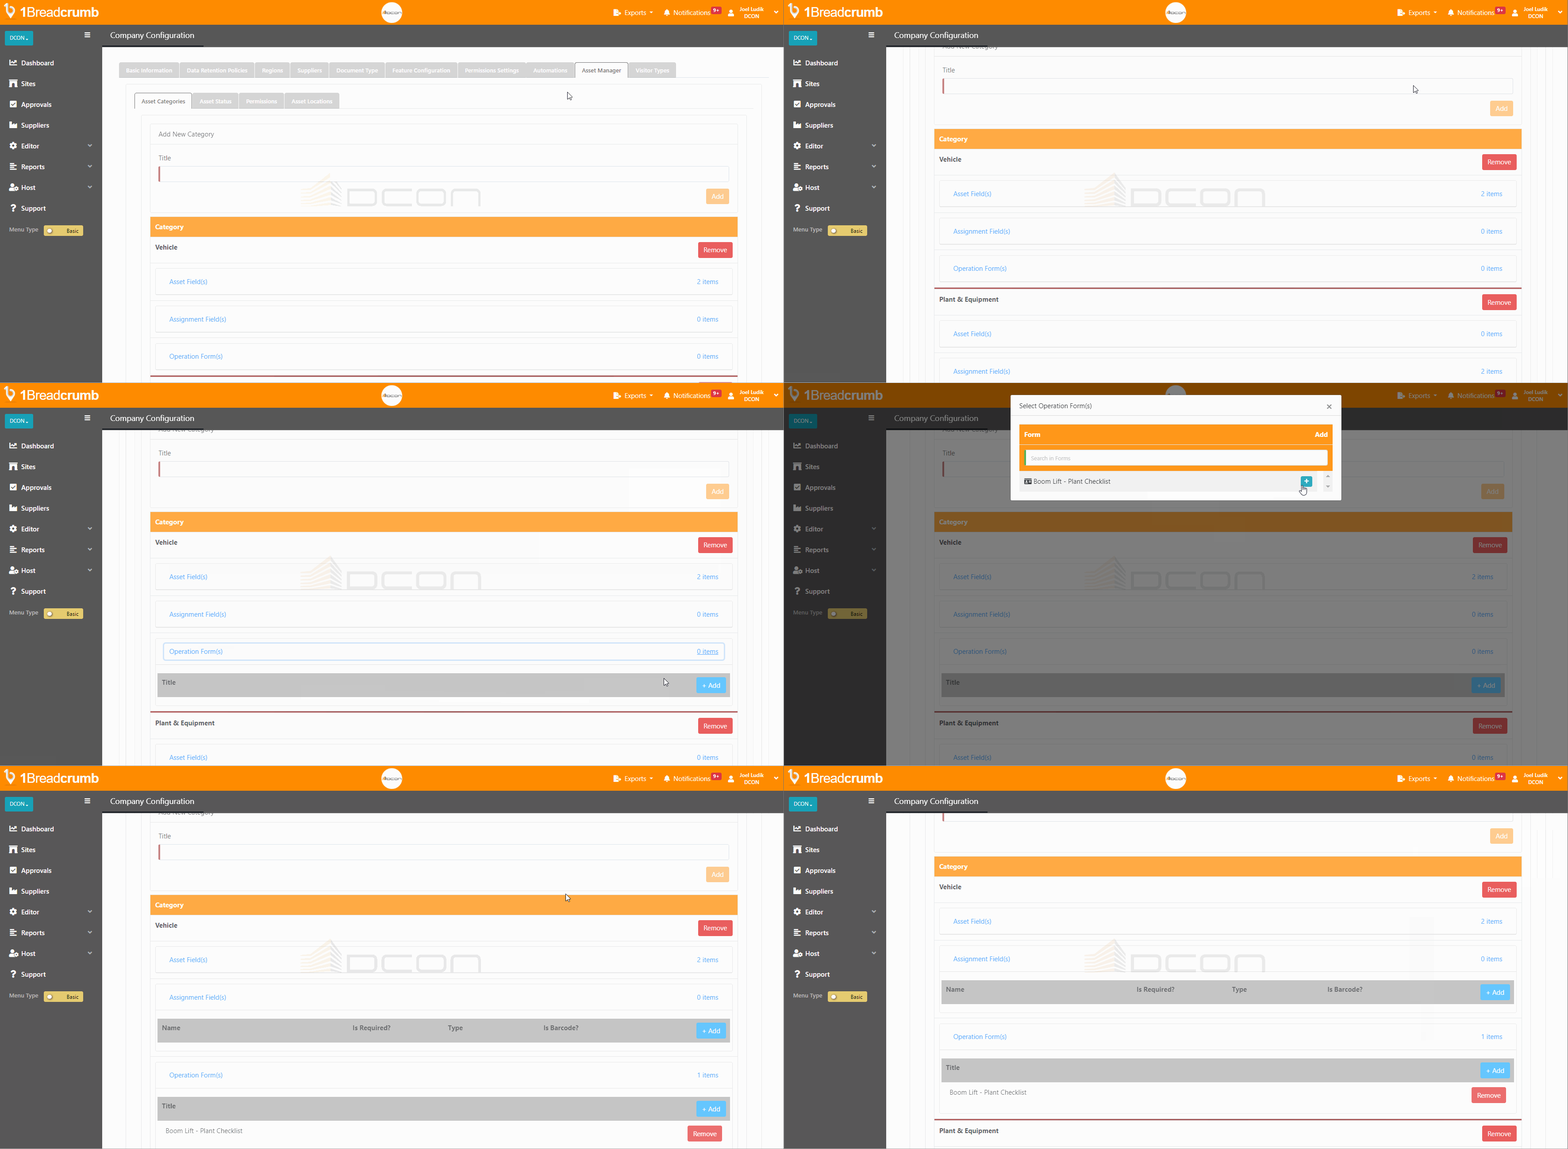
- Scroll down to the Asset Category you wish to edit and select Operation Form(s)
- Select +Add to add an Operation Form to the Asset Report Form
- Note: You will need to have created an Operation Form previously
- Click on the blue + button to add your Operation Form

You can now register company assets in the Asset Report for your Employees to borrow, assign, and return plant and equipment across your sites.
Mobile App Instructions 📱
This feature is not available on the Mobile App.