Deactivate or Reactivate an Induction
A guide to deactivating and reactivating inductions.
Deactivating inductions will help maintain a tidy register of the Induction materials created by your business, while still allowing you the flexibility to reactivate them whenever necessary.
Table of Contents
Requirements
Permissions: Company Hosts with all permissions. If you do not have these permissions, please reach out to your 1Breadcrumb administrator.
Note: All previously completed Inductions records will still be accessible via the Reports tool.
Web Portal Instructions 💻
Step 1: Deactivate an Induction 👋
- Navigate to the Editor tool located on the left-hand toolbar of your 1Breadcrumb portal.
- Select Inductions from the dropdown menu.
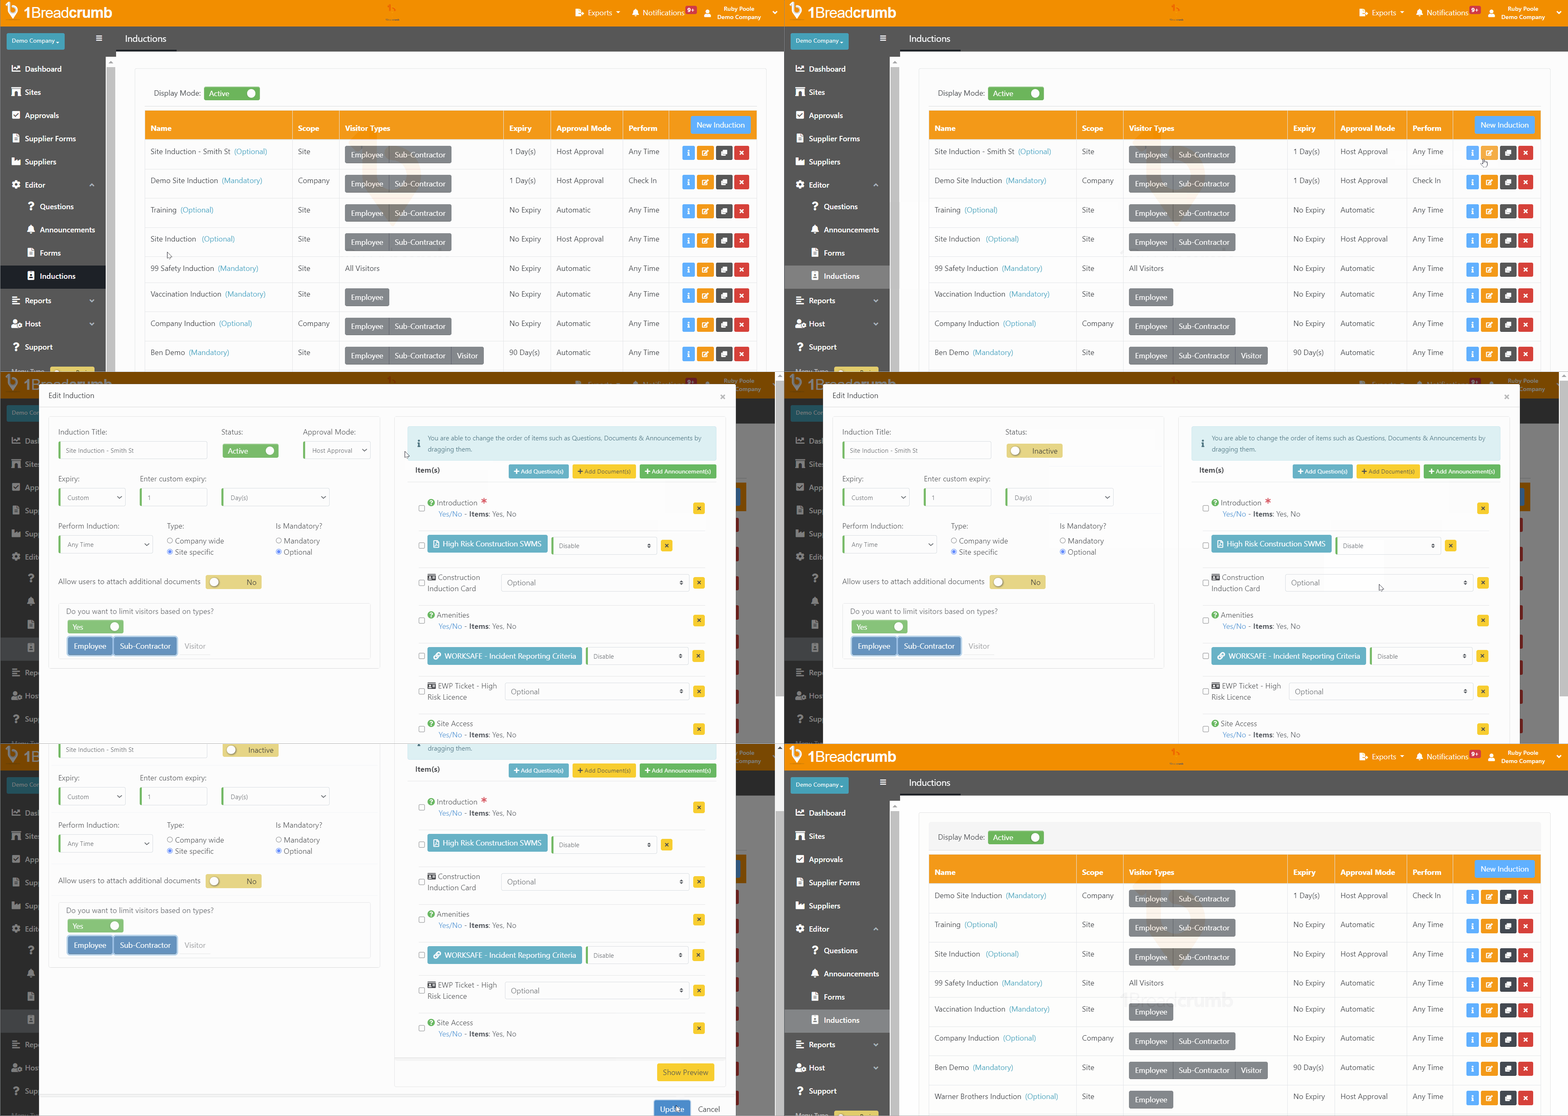
- Locate the Induction you want to deactivate, and click on the orange Edit icon.
- In the pop-up window, find the Status section and click on the green Active switch. This action will change the button to yellow, showing that the induction is now inactive.
- Save your changes by clicking Update in the bottom left-hand corner of the pop-up window.

View Deactivated Inductions 👀
- Navigate to the Editor tool located on the left-hand toolbar of your 1Breadcrumb portal.
- Select Inductions from the dropdown menu.
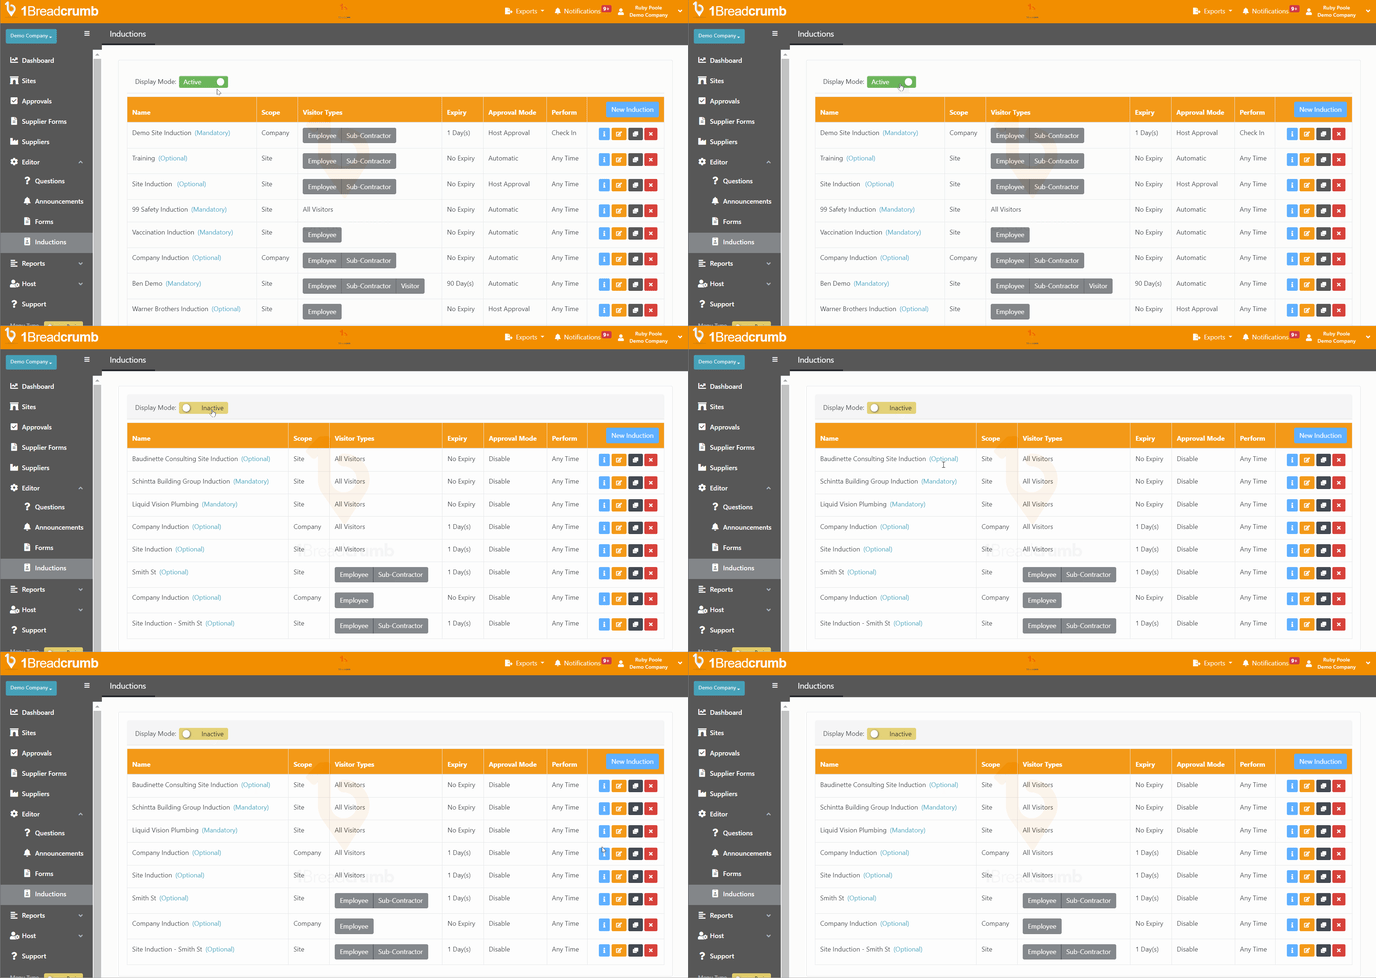
- Beside the Display Mode heading, toggle the Active switch to view all inductions that are currently inactive. This action will change the button to yellow with the heading Inactive.

Reactivate a Deactivated Induction 🚀
- Navigate to the Editor tool located on the left-hand toolbar of your 1Breadcrumb portal.
- Select Inductions from the dropdown menu.
- Under the Display Mode heading, click the Active toggle to view all of the inactive inductions

- Locate the one you want to reactivate and click on the orange edit icon
- In the pop-up window, find the Status section and click on the yellow Inactive switch. This action will change the button to green, showing that the induction is now Active.
- Decide the approval mode:
- Automatic: If you are happy for it to not be checked off by a host
- Host Approval: If you require a host to approve the induction
- Save your changes by clicking 'Update' in the bottom left-hand corner of the pop-up window.

Mobile App Instructions
This feature is only available on the Web Portal.