
Prior to initiating specific activities on site, for those seeking assurance that all necessary preparations are in order, either you or the personnel responsible for these activities can open Permits through 1Breadcrumb.
After creating a customised set of Permits, you can ensure that every detail is checked off and confirmed prior to the commencement of these activities.
Any Permits generated by you and opened by Subcontractors can undergo a thorough review process before giving Subcontractors the thumbs up, providing you the confidence that all requirements are met before any works begin!
If the Permit is initiated in advance of the scheduled activities, you also have the option to establish hold points. This involves a secondary review to verify each control since the initial opening of the Permit.
With 1Breadcrumb, additional hold points can be incorporated into your Permits, including post-completion checks. If you desire further inspections after the work is finished or at specific milestones in the activity, you have the flexibility to do so. This ensures that the work undergoes scrutiny at every stage, offering you the peace of mind that the activities are proceeding as intended and are under proper control!
Table of Contents 💡
Web Portal Steps 💻
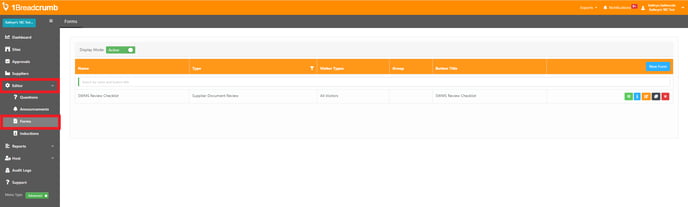
- Navigate to the 'Editor' tool located on the left-hand toolbar of your 1Breadcrumb portal. Select ‘Forms’ from the dropdown menu.
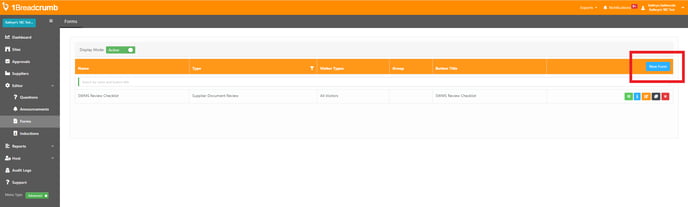
- Click the blue 'New Form' button.
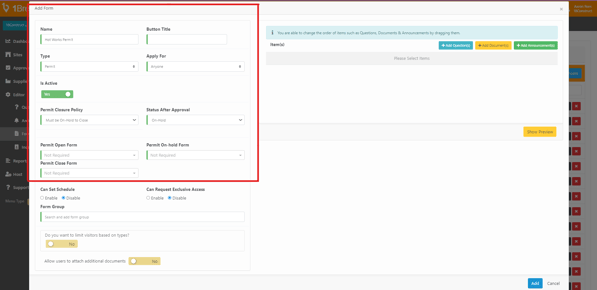
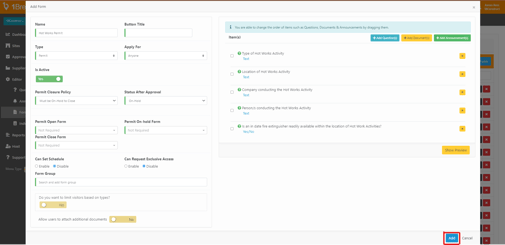
- In the left hand side of the pop-up window, complete the Permit configuration setting fields. Click Here for a Description of each Permit Configuration Settings.
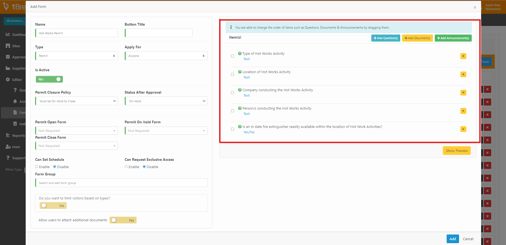
- In the right-hand side of the pop-up window, input all the required question fields, documents, and announcements related to this Permit.
- +Add Questions: From the pop-up window, find the specific Questions you want the individuals to answer upon completing this permit. Remember, you can personalise and adjust the question settings. For example, you can make questions multiple-choice, text-based, or mandatory. For comprehensive instructions on how to customise and set up question sets, please click here.
- +Add Documents: From the pop-up window, find Documents you want to include in the permit. For comprehensive instructions on how to create Documents, please click here.
- + Add Announcements: From the pop-up window, find Announcement you want to include in the permit. For comprehensive instructions on how to create Announcements, please click here. In the dropdown box next to your chosen Announcement, specify whether recipients should view and/or acknowledge the Announcement by selecting from the following options:
- Disable: Recipients can choose to open and view the announcement at their own discretion.
- Mandatory View: Recipients are obligated to open and view the announcement.
- Mandatory View and Sign Off: Recipients must open, view, and acknowledge the announcement.
- Set Play Through To Mandatory: When uploading video media, recipients are unable to fast forward or skip the video.
- Upon finalising all of your Permit settings, click ‘Add’ in the bottom right hand side of the pop-up window.
🎉 Congratulations! Your Permit will now be live and distributed according to your chosen settings above 🎉
Description of Permit Configuration Settings ❓
- “Name”: Type the title of the Permit to Work in the 'Name' field.
- “Button Title”: Type the title of the button name in the 'Button Title field. This will be the name of the button which will appear on the app for a person to select when choosing a permit to open.
- “Type”: Using the dropdown menu select “Permit” if creating a Permit to Work or select “Generic” if creating a Hold Point checklist to accompany your Permit to Work. If creating a Hold Point checklist, please follow this hyperlink to create the Hold Point question sets relevant to the Permit to Work and attach it accordingly.
- “Apply For”: Narrow down the audience of who this Permit to Work can be opened by by selecting from the following:
- “Anyone”: Anyone associated with the site the Permit to Work is applied to can open.
- “Individual”: The Permit to Work can be opened by certain individuals only.
- “Supplier”: The Permit to Work can be opened by certain Suppliers only.
- “Is Active”: Click the toggle 'Is Active' to deactivate the Permit to Work, if needed.
- “Permit Closure Policy”: Using the dropdown menu, select when the Permit to Work status can be changed to closed:
- “Must be On Hold to close”: Meaning the Permit must undergo a Hold Point checklist before the Permit to Work status can be changed to closed.
- “Can close while Open or On Hold”: Meaning the Permit status can be changed to closed open completion of the works, if a Hold Point checklist has been created for this Permit, but was not completed.
- "Status After Approval": Using the dropdown menu, select if you want the permit to start in the On-Hold or Open Status.
a. "On-Hold": Is the default and requires the Permit applicant to manually complete the Open stage of the permit after Approval. This signals they are physically beginning the work, which could utilise a form if required.
b. "Open": The Permit automatically starts in the Open stage after approval. This doesn't require the Permit applicant to signal when they are beginning the works. - “Permit Open Form”: Use the dropdown menu to select the checklist you want to be completed after the Permit is requested but before the Permit is approved to commence.
- “Permit On-Hold Form”: Use the dropdown menu to select the checklist you want to be completed after a portion of the activities are complete and before they return to re-open before completing the remaining works.
- “Permit Close Form”: Use the dropdown menu to select the checklist you want to be completed to determine the Permit status can be changed to closed.
- “Can Set Schedule”:
- “Enable”: Check this option if you want the person who is opening the permit to allocate a permit open/close date.
- “Disable”: Check this option if you only want Company/Site Hosts to to allocate a permit open/close date.
- “Can Request Exclusive Access”:
- “Enable”: Check this option if you want the person who is opening the permit only to make changes to the permit.
- “Disable”: Check this option if you allow other persons to make changes to opened permits.
- “Form Group”: Choose or create a category (e.g., High Risk Permits, Environmental Permits, etc.). By establishing a grouping name for the permit, this will be beneficial in the future when you wish to filter and access the list of created Permits using the Reports Tool.
- 'Do you want to limit visitors based on types?': Further specify the check-in types you want to complete this Permit by enabling the 'Do you want to limit visitors based on types?' toggle. From the list of check-in types, you can select the ones that can open this Permit.
- 'Allow users to attach additional documents': Decide whether users are permitted to attach additional documents by clicking the 'Allow users to attach additional documents' toggle. Note: This is advised if you want persons completing the permits to upload supporting files.
Helpful Tips 💥
Helpful Tip #1:
In the “Add Form” window you are able to change the order of items such as Questions, Documents & Announcements by clicking and dragging them.
Helpful Tip #2:
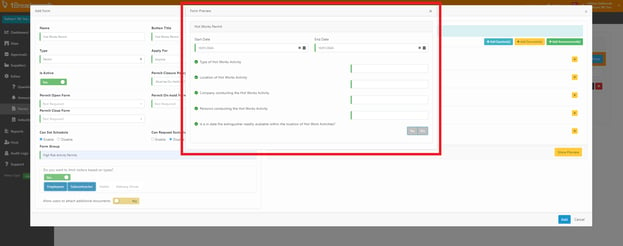
By clicking the ‘Show Preview’ button located on the bottom right hand side of the “Add Form” window, you will be able to see a preview of how the Permit will be presented when opened. 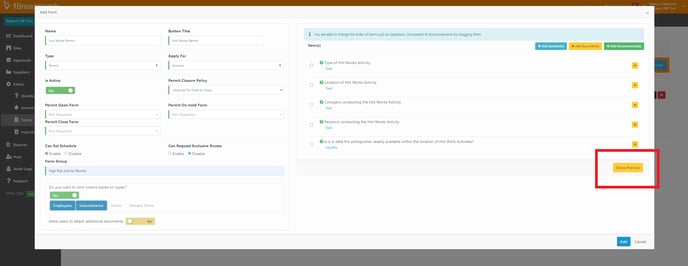
Requirements ❗
- Only Company Hosts have the ability to create or modify Permits. If you require any Permits created or changes needed to existing Permits, please reach out to your Company Hosts.
- This function cannot be performed via the Mobile App. Please log into 1Breadcrumb via your computer or laptop.